Concrete Patio Lighting Ideas for Minneapolis Backyards: Extending Your Outdoor Living Season

Transform your Minneapolis concrete patio with strategic lighting. Expert guidance on LED options, safety considerations, and extending Minnesota outdoor living into evening hours.

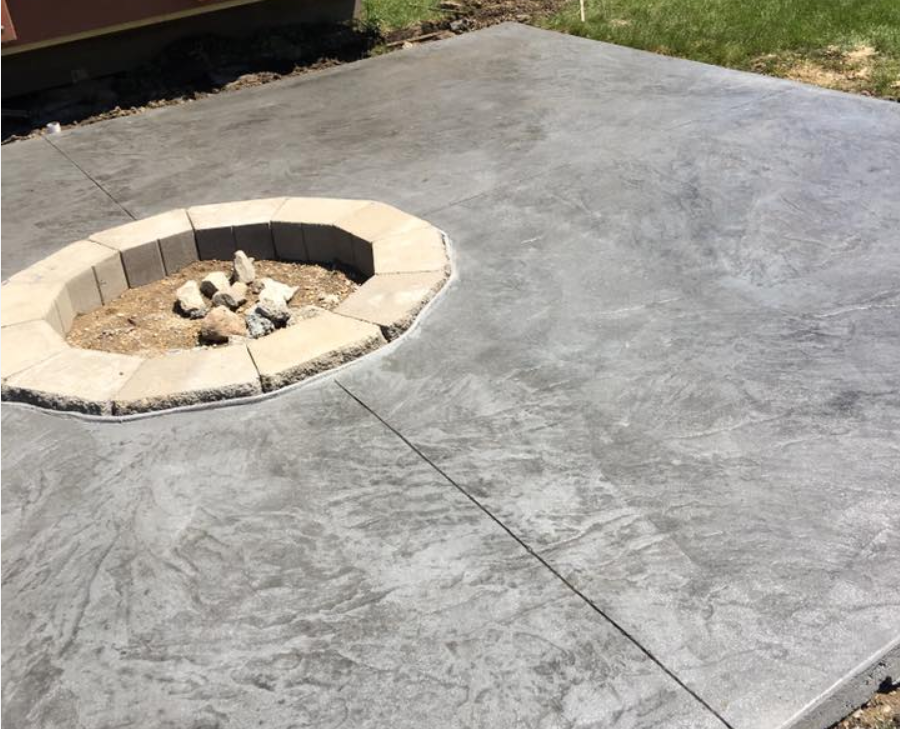
Your concrete patio looks beautiful during daylight hours, but after sunset it becomes invisible—wasted space that sits dark and unused while your family remains inside. In Minneapolis, where we treasure every warm evening from May through September, that's four months of potential outdoor living lost to darkness. The solution isn't complicated or prohibitively expensive: strategic patio lighting transforms your outdoor space from daylight-only to a functional evening destination that extends your home's living area.

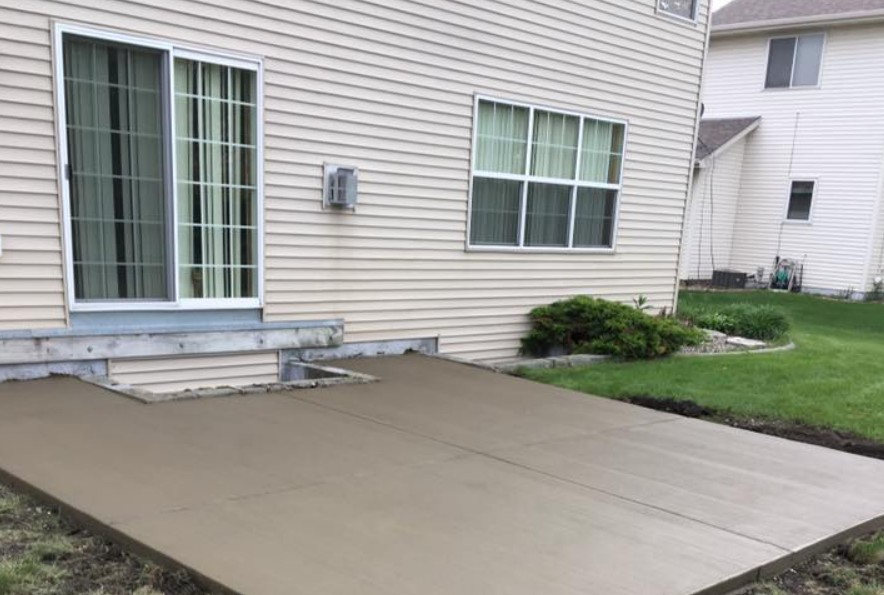
After installing concrete patios across the Twin Cities since 2004, we've learned that lighting considerations should begin during patio planning, not as an afterthought years later. Whether you're designing a new patio or enhancing an existing one, understanding lighting integration options, safety requirements, and Minnesota-specific considerations helps you create outdoor space that serves your family from afternoon through late evening.

This comprehensive guide explores concrete patio lighting from every practical angle: planning lighting during initial patio construction versus retrofitting existing patios, LED technology options that maximize value, safety and code requirements, integration with Minnesota's seasonal patterns, and cost-effective approaches that deliver professional results.

Why Patio Lighting Matters in Minneapolis

Before discussing specific lighting techniques, understanding the benefits helps you prioritize your investment.

Extending Minnesota's Short Outdoor Season

Minneapolis experiences approximately 130-150 comfortable outdoor days annually (temperatures above 60°F). But daylight hours don't align with when most people are home:

May-August Sunset Times: The sun sets between 8:00-9:00 PM during peak summer months. For homeowners who don't arrive home until 6:00 PM, that provides only 2-3 hours of daylight patio use on weekday evenings.

September-October: As fall arrives, sunset moves to 6:30-7:30 PM. Without lighting, your patio becomes unusable immediately after work, eliminating outdoor dining and evening relaxation during some of Minnesota's most beautiful weather.

Spring and Late Fall: The shoulder seasons offer pleasant evenings (55-65°F) perfect for fire pit gatherings or covered patio use—if you have lighting. Darkness by 6:00-7:00 PM makes these evenings unusable without illumination.

Proper patio lighting effectively doubles your outdoor season's usable hours, transforming your patio from a weekend-lunch destination to an every-evening retreat.

Safety and Liability Concerns

Unlit patios create genuine safety hazards:

Step and Level Changes: Tiered patios with multiple levels require illumination to prevent falls. A 6-8 inch step that's obvious in daylight becomes invisible in darkness.

Edge Transitions: Where concrete meets lawn, gravel, or other materials, the transition creates tripping hazards in low light.

Furniture and Obstacles: Tables, chairs, planters, and grills that guests easily navigate in daylight become collision hazards after dark.

Wet Surface Visibility: Minnesota's frequent rain creates slick concrete surfaces. Proper lighting helps people see and avoid the slipperiest areas.

Beyond immediate safety, homeowner liability exists if guests are injured on your property. Adequate lighting demonstrates reasonable precautions against foreseeable hazards.

Property Value and Curb Appeal

Real estate professionals report that professionally lit outdoor spaces add significant perceived value:

Nighttime Curb Appeal: Homes with illuminated outdoor living spaces create striking first impressions during evening showings. The spaces appear larger, more valuable, and better maintained.

Extended Living Space Calculation: Buyers mentally calculate usable square footage. A 400-square-foot patio used only during daylight offers less value than the same patio that functions evening through night.

Lifestyle Appeal: Modern buyers prioritize outdoor entertaining. Well-lit patios signal that the property supports the lifestyle they're seeking.

While lighting installation costs $1,500-$5,000 for typical residential patios, the perceived value addition often exceeds $5,000-$10,000, delivering strong return on investment.

Planning Lighting During New Patio Construction

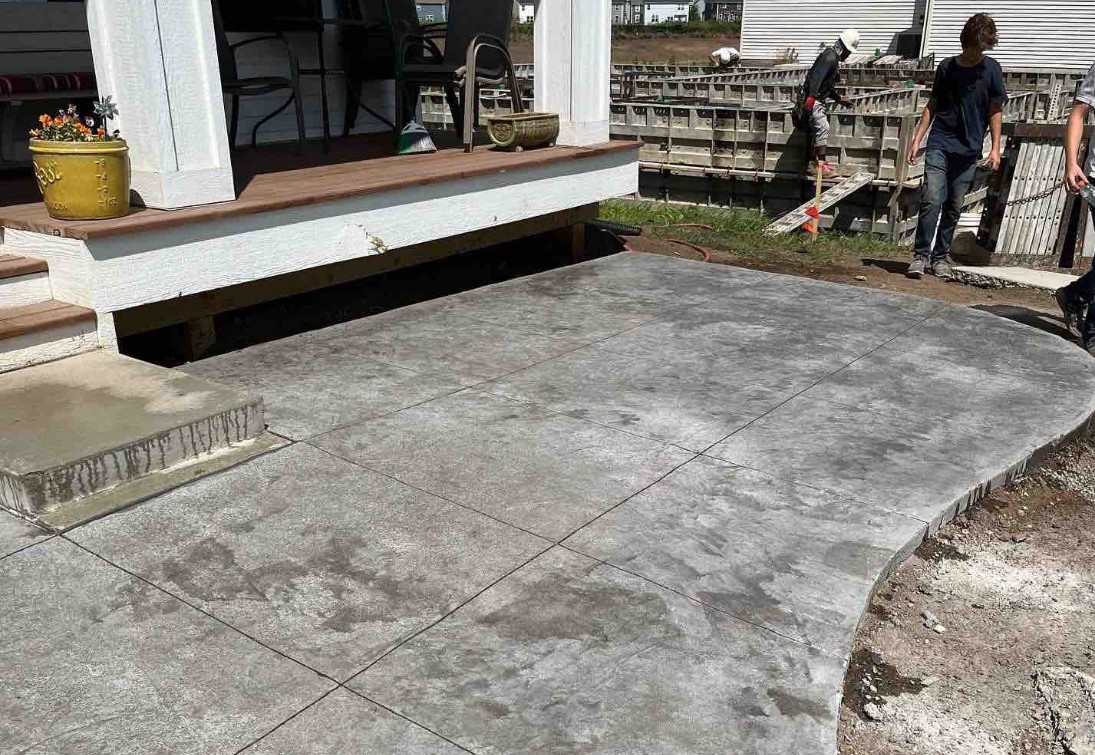
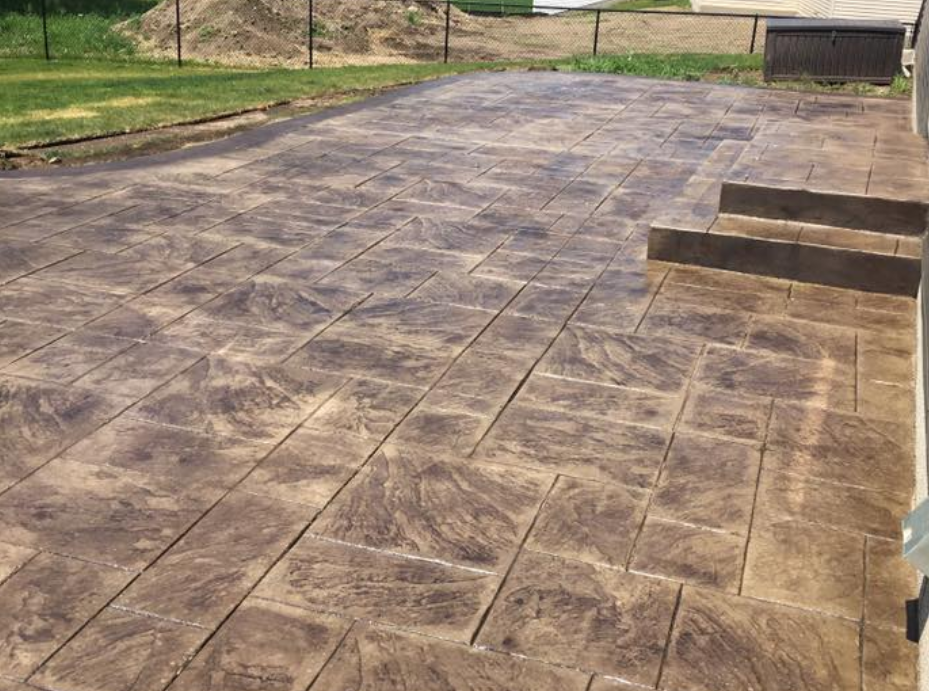
The optimal time to address patio lighting is during initial design and construction, not years later as a retrofit project.

Benefits of Integrated Lighting Design

Building lighting into new patio construction offers several advantages:

Conduit and Wiring Integration: Electrical conduit (protective pipes for wiring) can be embedded beneath the concrete during construction. This creates pathways for future wiring additions without breaking concrete, significantly reducing long-term costs and giving you flexibility.

Post and Column Foundations: If your design includes columns, pergola posts, or built-in seating walls, electrical boxes and conduit can be integrated into foundations before concrete is poured. This enables lighting within these structures without visible surface-mounted wiring.

Step Lighting Recesses: Built-in step lights require recessed fixtures installed during construction. Retrofitting these into existing steps is expensive and often impossible without demolition.

Drainage Coordination: Lighting system components—transformer boxes, junction boxes, and conduit routes—must be coordinated with patio drainage systems and proper grading. Planning both simultaneously prevents conflicts.

Cost Savings: Incorporating lighting infrastructure during construction typically costs 30-50% less than retrofitting equivalent systems years later. Even if you don't install fixtures immediately, having conduit and electrical boxes in place provides affordable future options.

Where to Stub Electrical for Future Flexibility

Even if budget doesn't allow complete lighting installation initially, strategic electrical stubouts provide future capability:

Patio Perimeter Locations: Stub electrical boxes every 15-20 feet around the patio perimeter. This allows future installation of uplights for nearby trees, shrubs, or architectural features without breaking concrete.

Column and Post Locations: Any structural posts or columns should have electrical rough-in at their base, even if lighting isn't immediately installed.

Step Locations: Both top and bottom of any stair sections should have stubbed electrical for future step lighting.

Central Patio Area: A junction box in the center or near the dominant seating area provides power for overhead string lights, umbrella lighting, or future chandelier installation on pergola structures.

Transformer Location: A weatherproof electrical box near your house or garage, sized for a lighting transformer, allows future low-voltage system installation.

These stubouts typically add $400-$1,000 to initial patio construction costs but save $2,000-$4,000 compared to retrofitting through concrete later.

Working with Electrical Code Requirements

Minnesota electrical code (based on National Electrical Code with state amendments) governs outdoor lighting installations:

GFCI Protection Required: All outdoor electrical outlets and lighting circuits must have Ground Fault Circuit Interrupter protection to prevent shock hazards in wet conditions.

Buried Cable Depth: Direct-burial cables must be at least 18 inches deep (24 inches in areas subject to vehicle traffic). Low-voltage landscape lighting wiring typically requires 6-12 inches minimum.

Weatherproof Components: All outdoor electrical boxes, receptacles, switches, and transformers must be rated for wet locations (not just "damp" locations).

Permit Requirements: Most Minneapolis suburbs require electrical permits for new 120-volt outdoor circuits. Low-voltage landscape lighting (12V or 24V) often doesn't require permits, but verify with your local building department.

Professional electricians familiar with outdoor installations ensure compliance and safety. DIY electrical work outdoors is both dangerous and potentially illegal without proper permits and inspections.

Lighting Techniques for Different Patio Areas

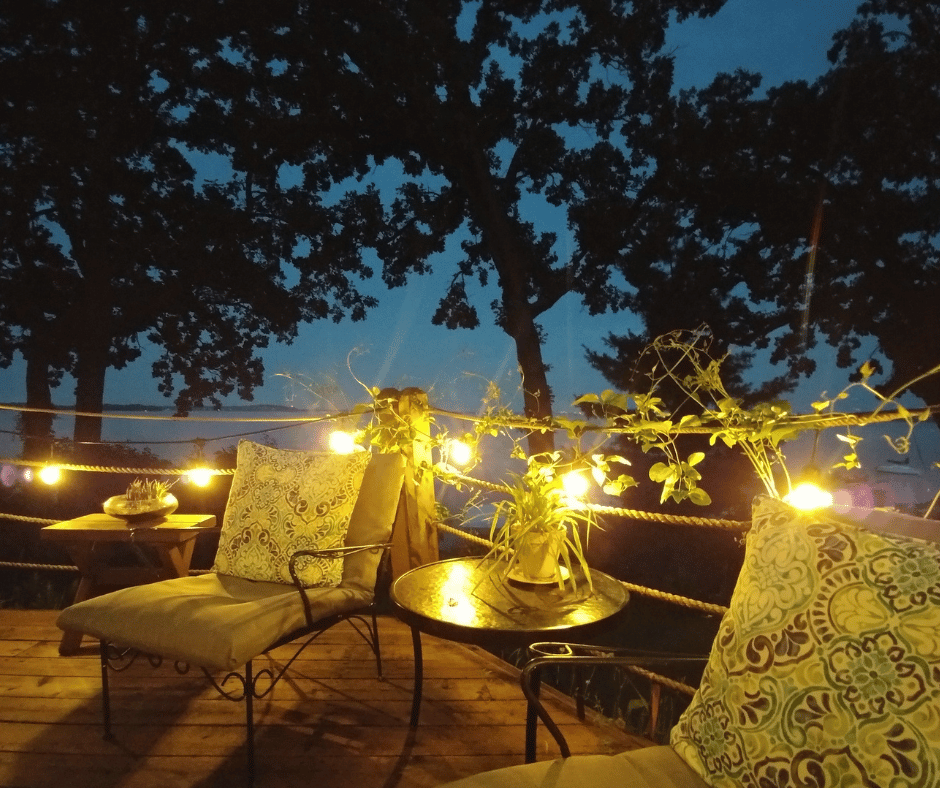
Strategic lighting uses multiple techniques to create layered illumination that's both functional and attractive.

Ambient Lighting: Overall Illumination

Ambient lighting provides general illumination that makes the patio functional and comfortable:

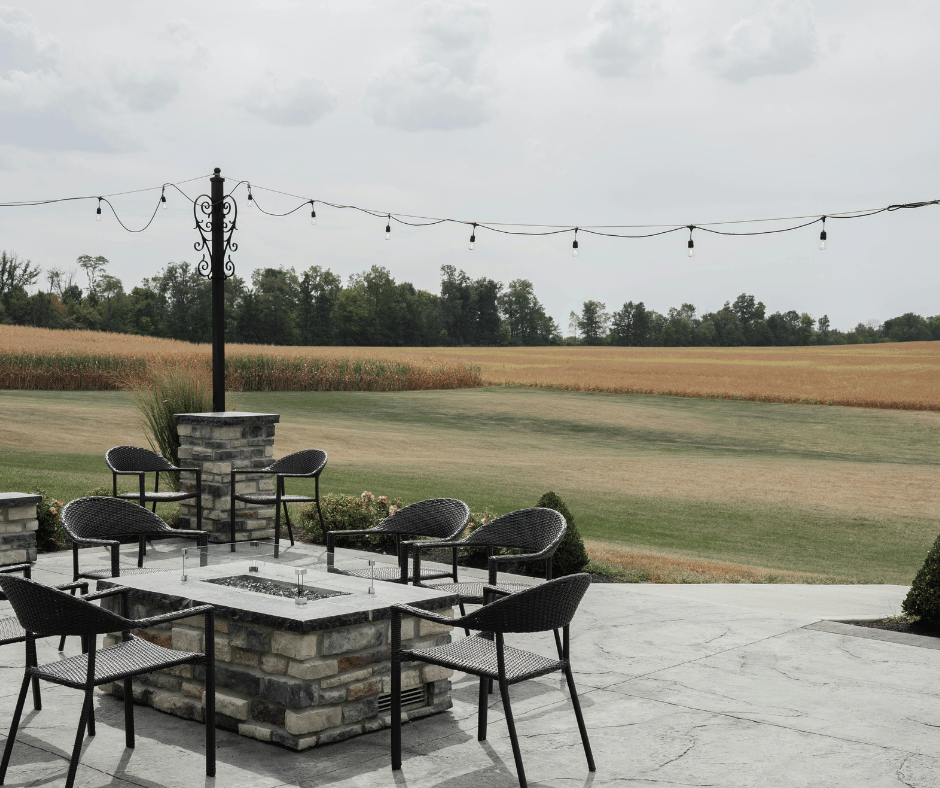
Overhead String Lights: Commercial-grade string lights suspended across the patio create warm, inviting ambient light. Modern LED string lights with Edison-style bulbs offer energy efficiency with nostalgic aesthetic appeal.

  • Installation: Requires support posts, cables, or overhead structures (pergolas, arbors)
  • Light level: Provides enough illumination for general movement and conversation
  • Cost: $300-$1,200 for 30-50 foot coverage including supports
  • Lifespan: LED bulbs last 15,000-25,000 hours (10+ years of seasonal use)

Overhead Fixture Mounting: Ceiling-mounted fixtures on covered patios or pergola structures provide consistent ambient light similar to indoor spaces.

  • Options: Flush-mount fixtures, pendant lights, or chandeliers designed for wet/damp locations
  • Control: Should be dimmable to adjust mood and intensity
  • Cost: $150-$800 per fixture plus installation
  • Integration: Can be controlled with same switches as indoor lighting

Post-Mounted Area Lights: Freestanding posts with downward-facing fixtures create pools of light without overhead structures.

  • Placement: Typically 10-15 feet apart around patio perimeter
  • Height: 6-8 feet tall to provide overhead lighting without glare
  • Cost: $200-$500 per post including installation
  • Style options: Traditional lantern styles or modern contemporary designs

Task Lighting: Functional Illumination

Task lighting focuses on specific activity areas requiring higher illumination:

Grilling and Food Prep Areas: Dedicated lighting for outdoor kitchens and grilling stations ensures safe food handling:

  • Options: LED strips under counters, directional spotlights, or grill-mounted lights
  • Light level: 30-50 foot-candles for prep surfaces (similar to kitchen counter lighting)
  • Color temperature: 3000-4000K for accurate food color assessment
  • Cost: $100-$400 depending on configuration

Dining Table Lighting: Focused illumination over dining areas without excessive brightness:

  • Options: Pendant lights suspended over table, adjustable spotlight from pergola, or focused downlights
  • Dimming: Essential for creating dining ambiance
  • Height: Pendant lights should hang 30-36 inches above table surface
  • Cost: $200-$800 per table zone

Seating and Conversation Areas: Moderate lighting that allows face-to-face interaction without harsh shadows:

  • Options: Indirect uplighting, wall sconces on nearby structures, or floor-level accent lights
  • Light level: 5-10 foot-candles (much lower than task lighting)
  • Placement: Multiple lower-intensity sources better than single bright light
  • Cost: $150-$400 per conversation zone

Accent Lighting: Aesthetic Enhancement

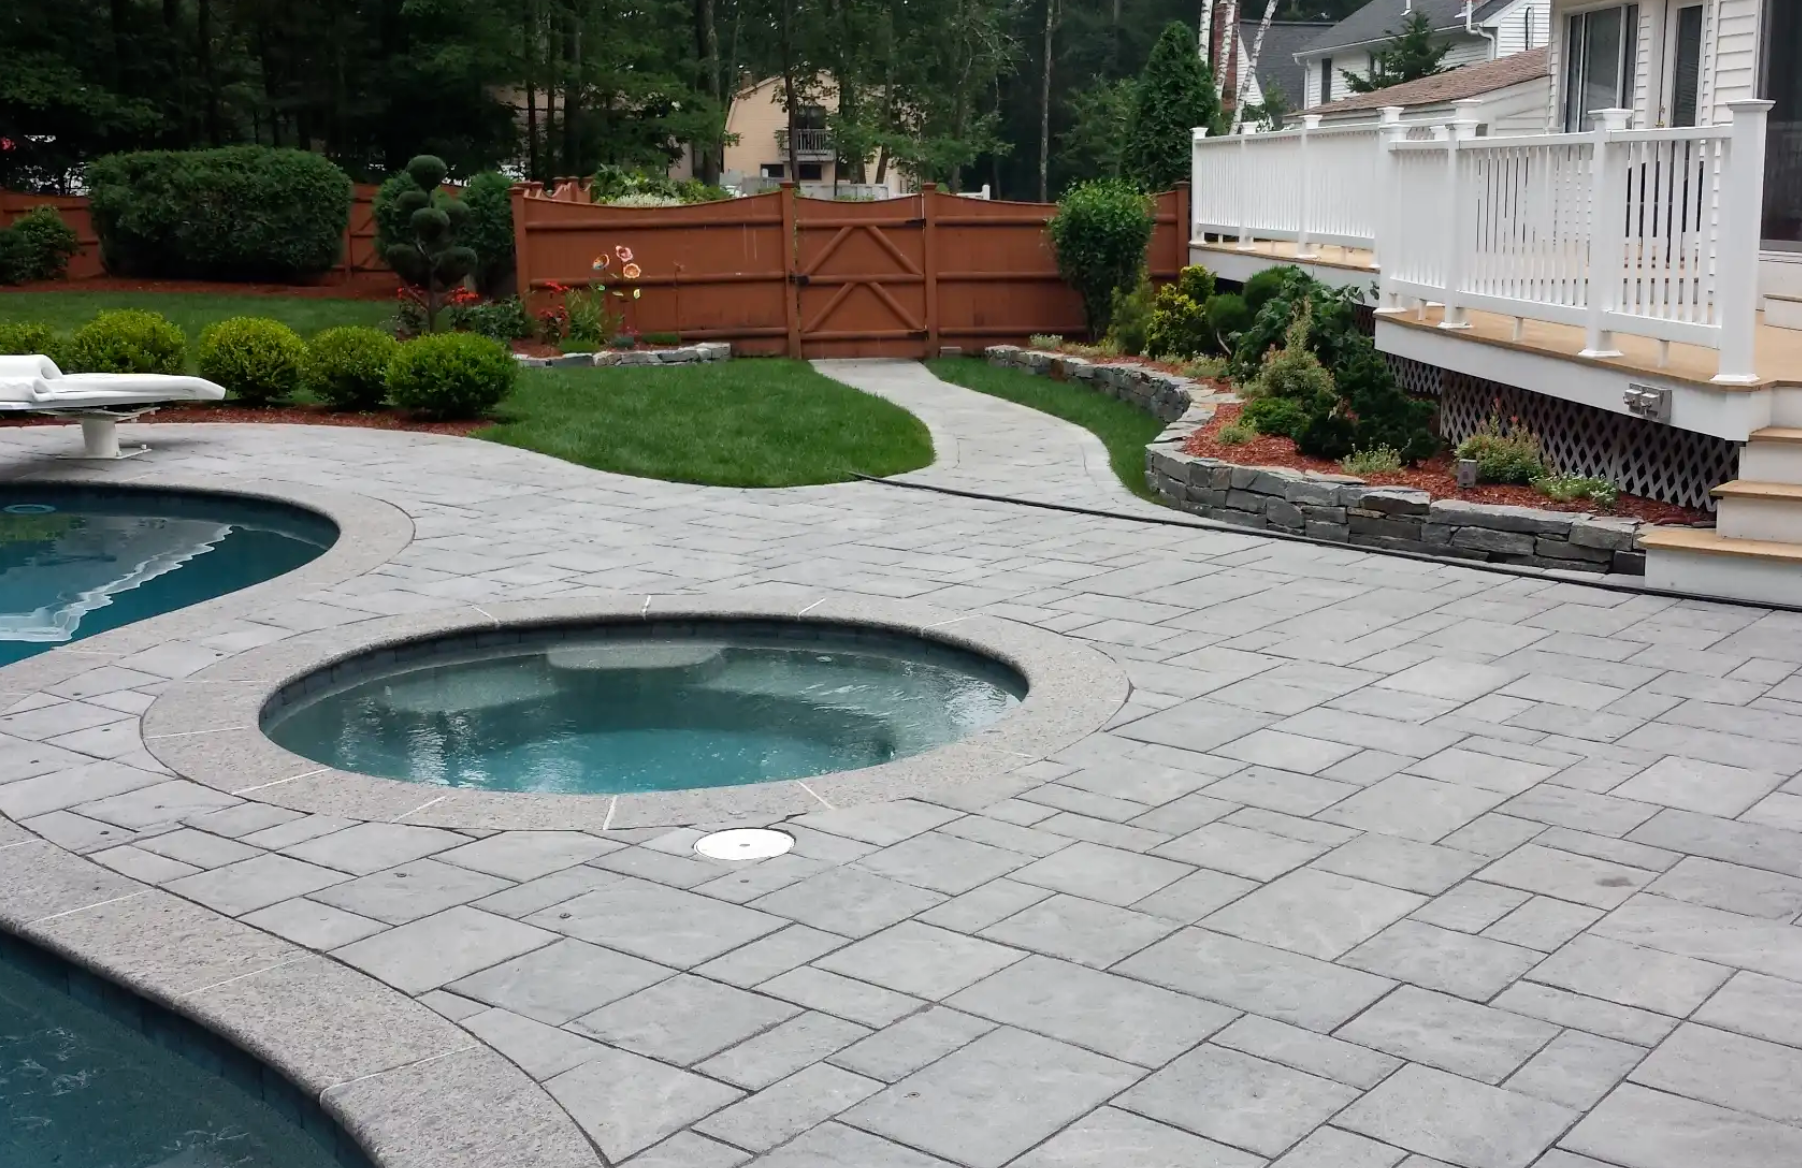
Accent lighting highlights attractive features and creates visual interest:

Uplighting for Trees and Plantings: Ground-mounted fixtures that shine upward through tree canopies or highlight specimen plants create dramatic effects:

  • Placement: Position fixtures at base of trunk or 2-3 feet from plant center
  • Beam angle: Narrow (15-25°) for tall trees, wide (40-60°) for shorter shrubs
  • Wattage: 3-7 watts LED for shrubs, 7-15 watts for large trees
  • Cost: $80-$200 per fixture plus $50-$100 installation

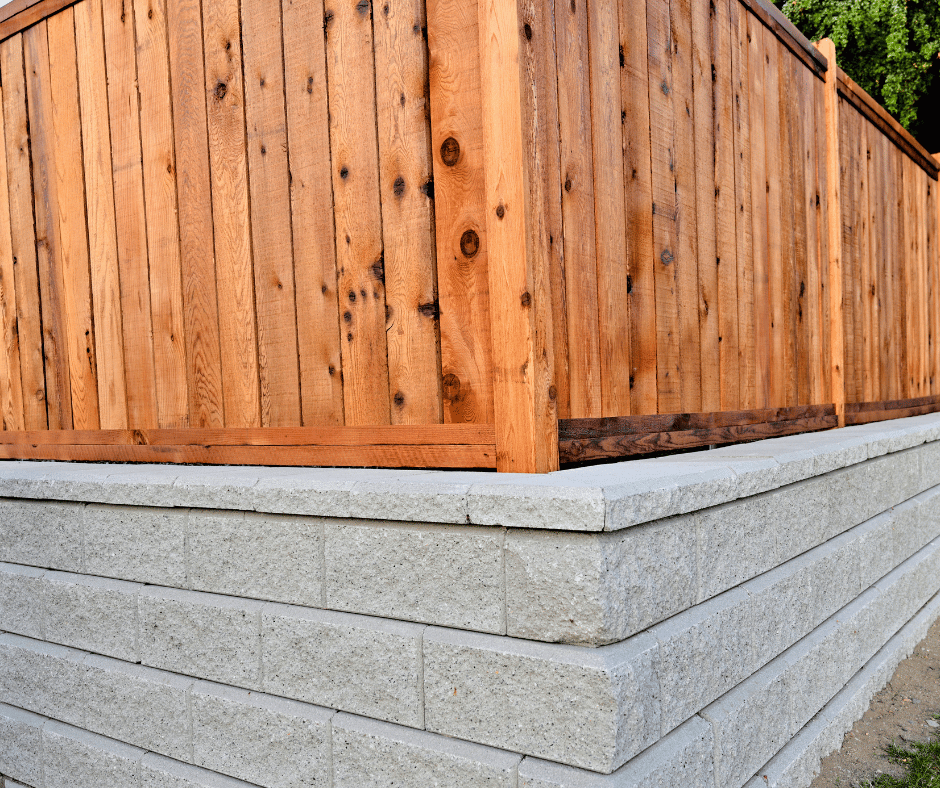
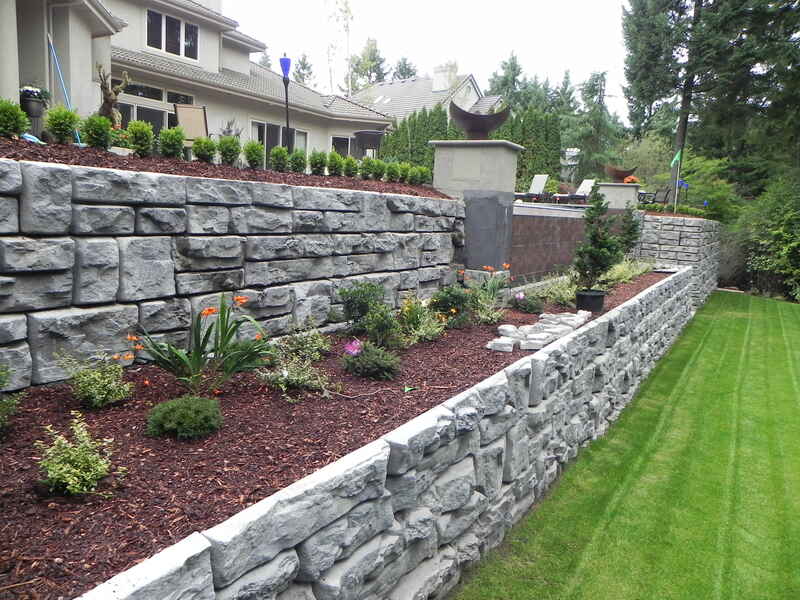
Retaining Wall Wash Lighting: Fixtures that graze light across textured wall faces emphasize dimensional stone or block patterns:

  • Placement: 12-18 inches from wall face, aiming along the surface
  • Effect: Creates dramatic shadows from texture while illuminating the wall
  • Options: Bullet-style adjustable fixtures or specialized wall wash lights
  • Cost: $60-$150 per fixture, spaced 4-6 feet apart

Water Feature Lighting: If your patio includes fountains, ponds, or water elements, submersible or positioned lighting creates focal points:

  • Underwater fixtures: Submersible LED lights within water features
  • Aimed fixtures: Bullet lights positioned to highlight moving water
  • Safety: All water feature lighting requires specialized wet-location fixtures
  • Cost: $100-$400 per water feature depending on size

Safety Lighting: Preventing Accidents

Safety lighting specifically addresses hazard areas:

Step Lighting: Integrated lights that illuminate step treads and risers:

  • Recessed step lights: Built into riser faces during construction
  • Surface-mounted step lights: Retrofit options attached to existing steps
  • Placement: Each step riser should be illuminated
  • Cost: $40-$120 per step for recessed lights, $25-$60 for surface-mount

Edge and Transition Lighting: Low-level lights marking where concrete meets other surfaces:

  • Path lights: Small fixtures placed at transitions between materials
  • LED strip lighting: Continuous illumination along edges
  • Bollard lights: Short posts marking transitions and corners
  • Cost: $30-$100 per transition point

Handrail and Railing Lighting: For patios with railings, integrated lighting improves safety:

  • Under-rail LED strips: Continuous lighting along railing bottom edge
  • Post cap lights: Fixtures integrated into railing posts
  • Options: Solar-powered post caps or low-voltage wired systems
  • Cost: $40-$150 per post or $200-$500 for continuous rail lighting

LED Technology: Why It's the Only Choice for New Installations

LED (Light Emitting Diode) technology has revolutionized outdoor lighting, making older halogen and incandescent systems obsolete for new installations.

Energy Efficiency and Operating Costs

The energy savings from LED systems are dramatic:

Power Consumption Comparison:

  • Traditional halogen landscape light: 20-50 watts per fixture
  • LED equivalent: 3-7 watts per fixture
  • Energy savings: 80-90% reduction

Annual Operating Cost Example:

  • 20 halogen fixtures (30 watts each): 600 watts × 5 hours/day × 180 days × $0.13/kWh = $70 annually
  • 20 LED fixtures (5 watts each): 100 watts × 5 hours/day × 180 days × $0.13/kWh = $12 annually
  • Savings: $58 per year, every year

Over a 15-year LED lifespan, this saves $870 in electricity costs alone, often covering the entire lighting system's initial cost.

Lifespan and Maintenance Reduction

LED durability eliminates the frequent bulb replacements that plagued older systems:

Lifespan Comparison:

  • Halogen landscape bulbs: 2,000-3,000 hours (1-2 years of seasonal use)
  • LED fixtures: 25,000-50,000 hours (15-25 years of seasonal use)

Maintenance Implications:

  • Halogen systems: Annual bulb replacement across 20+ fixtures, climbing ladders, purchasing replacement bulbs
  • LED systems: Essentially maintenance-free for 15-20 years

This maintenance reduction saves both time and money. Professional bulb replacement services charge $50-$150 per service call, while DIY replacement requires purchasing bulbs ($8-$15 each) and spending hours on ladder work.

Light Quality and Color Options

Modern LEDs produce excellent light quality with unprecedented control:

Color Temperature Options:

  • Warm white (2700K): Resembles traditional incandescent, creates cozy ambiance
  • Soft white (3000K): Balanced neutral tone, popular for general outdoor use
  • Cool white (4000K): Crisp, modern appearance, good for task lighting
  • RGB color-changing: Entertainment and holiday lighting capabilities

Color Rendering Index (CRI): Quality LED fixtures provide CRI 80-90+, accurately showing true colors of plants, food, skin tones, and materials. This matters for outdoor dining and entertaining where you want things to look natural and appealing.

Dimming Capability: Modern LED systems dim smoothly from 100% down to 10% or less, allowing you to adjust ambiance from bright task lighting to subtle mood lighting.

Minnesota Weather Performance

LEDs perform exceptionally well in Minnesota's temperature extremes:

Cold Weather Operation: Unlike compact fluorescents that struggle in cold temperatures, LEDs actually produce more light in cold conditions. They remain fully functional at -40°F and below.

Heat Tolerance: Summer heat doesn't affect quality LED fixtures. They operate reliably through Minnesota's 90-100°F days.

No Warm-Up Time: LEDs reach full brightness instantly, unlike other technologies requiring warm-up periods. This matters for motion-sensor security lighting and evening patio use.

Weather Sealing: Modern LED fixtures designed for outdoor use handle Minnesota's rain, snow, and humidity without issues. Look for fixtures rated IP65 or higher for weather protection.

Retrofitting Lighting into Existing Patios

Most Minneapolis homeowners have existing concrete patios without integrated lighting infrastructure. Retrofitting is entirely feasible with careful planning.

Low-Voltage Landscape Lighting Systems

The most practical retrofit approach uses low-voltage (12V or 24V) landscape lighting:

System Components:

  • Transformer: Converts 120V household power to safe 12V or 24V
  • Outdoor-rated cable: Direct-burial wire connecting transformer to fixtures
  • Fixtures: LED lights designed for low-voltage systems
  • Timer or smart control: Automates lighting schedules

Installation Process:

  1. Mount transformer near outdoor electrical outlet or dedicated circuit
  2. Run low-voltage cable around patio perimeter (can be surface-laid and hidden with mulch, or buried 6-12 inches)
  3. Connect fixtures using quick-connect fittings at desired locations
  4. Aim and adjust fixtures for proper illumination
  5. Program timer or smart control for automatic operation

Advantages for Retrofits:

  • No electrical permits typically required (verify locally)
  • Safe DIY installation possible for handy homeowners
  • Cable routing doesn't require breaking concrete
  • Easy to modify, expand, or relocate fixtures
  • Lower installation costs than 120V systems

Cost Range: Complete 12-fixture low-voltage system with quality LED fixtures, transformer, and installation typically costs $1,200-$3,000.

Solar-Powered Options: Realistic Expectations

Solar lighting has improved significantly but remains limited for primary patio lighting:

Where Solar Works:

  • Accent lighting: Highlighting individual features or plants
  • Path marking: Low-level illumination along patio edges
  • Post cap lights: Decorative lighting on railing or pillar tops
  • Supplemental lighting: Augmenting main lighting system

Solar Limitations:

  • Light output: Even quality solar fixtures provide less light than wired systems
  • Weather dependence: Cloudy days mean dim nights in Minnesota
  • Winter performance: Short days and snow cover severely limit charging
  • Reliability: Battery life typically 2-5 years, requiring replacement
  • Placement restrictions: Fixtures must be positioned for direct sun exposure

Realistic Application: Solar works well for decorative accents and supplemental lighting but shouldn't be your primary patio lighting strategy. A mixed approach—wired system for main lighting, solar for accents—often works well.

Wireless Smart Lighting Systems

Modern technology enables sophisticated lighting control without extensive wiring:

Smart LED Options:

  • Battery-powered fixtures with wireless control: LED spotlights or string lights powered by rechargeable batteries, controlled via smartphone app
  • Solar-powered with wireless control: Solar fixtures that integrate with smart home systems
  • Plug-in smart fixtures: Traditional plug-in lights with smart plugs or built-in wireless control

Control Capabilities:

  • Smartphone apps: Turn lights on/off, adjust brightness, change colors from anywhere
  • Voice control: Integration with Alexa, Google Home, or Siri
  • Schedules and automation: Sunrise/sunset triggering, vacation modes, activity-based scenes
  • Group control: Command multiple fixtures simultaneously

Practical Considerations:

  • Battery systems require regular recharging (weekly to monthly depending on use)
  • Wireless range limitations with larger properties
  • Smart features require reliable WiFi coverage to patio area
  • Higher fixture costs than traditional systems

Cost Range: Smart lighting systems typically cost 30-60% more than equivalent traditional systems, ranging $1,500-$4,500 for comprehensive patio coverage.

Integrating Lighting with Pergolas and Overhead Structures

Covered patio areas and pergolas provide excellent opportunities for integrated lighting:

Pergola Lighting Strategies

String Lights Suspended Between Beams: The most popular pergola lighting creates an outdoor ceiling of lights:

  • Installation: Suspend café-style string lights between or along pergola beams using hooks or eye bolts
  • Bulb spacing: Typically 18-24 inches between sockets
  • Pattern options: Straight runs, crisscross patterns, or draped curves
  • Cost: $200-$800 for 30-50 feet of commercial-grade LED string lights

Recessed Downlights in Pergola Beams: Built-in fixtures create clean, architectural lighting:

  • Installation requires: Drilling through beams, running wiring through pergola structure
  • Placement: Every 4-6 feet along beams provides even coverage
  • Fixture types: Low-profile LED can lights or specialized pergola lights
  • Cost: $80-$200 per fixture plus electrical wiring

Chandelier or Pendant Fixtures: Dramatic focal lighting in covered patio centers:

  • Structural requirements: Pergola must be engineered to support fixture weight
  • Electrical access: Requires routing wiring to center mounting point
  • Height considerations: 7-8 feet above patio surface minimum for clearance
  • Cost: $300-$2,000 for fixture plus $200-$600 installation

Beam-Mounted Spotlights: Adjustable fixtures that direct light to specific areas:

  • Installation: Surface-mount to pergola beams or posts
  • Flexibility: Aim lights at dining, seating, or activity areas as needs change
  • Options: LED bullets or track lighting systems
  • Cost: $60-$150 per fixture

Fire Feature Integration

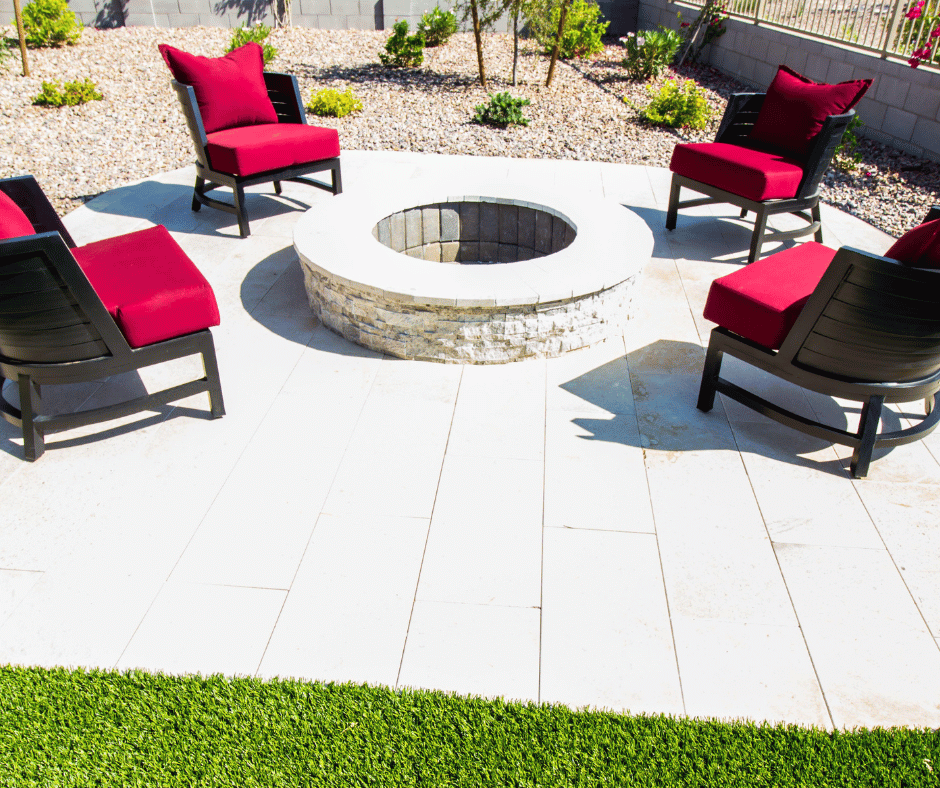
Fire pits and fireplaces create ambient light themselves but benefit from supplemental lighting:

Seating Area Illumination: Subtle lighting around fire pit seating that doesn't compete with fire:

  • Low-level path lights: Mark seating area perimeter without overwhelming firelight
  • Indirect uplighting: Soft illumination of nearby features creates context
  • Avoid: Bright task lighting that diminishes fire's romantic ambiance

Safety Lighting: Ensure safe access to and from fire features:

  • Path lighting: Continuous illumination from patio to fire pit area
  • Step lighting: If level changes exist between patio and fire pit
  • Emergency egress: Multiple routes should be illuminated

Smart Controls and Automation

Modern lighting control systems provide convenience and efficiency:

Timing and Scheduling Options

Photocell Controls: Automatic on/off based on ambient light levels:

  • Operation: Turns lights on at dusk, off at dawn
  • Advantages: No programming required, adjusts automatically for seasonal changes
  • Limitations: Turns all connected lights on/off together
  • Cost: $20-$60 for standalone photocells

Astronomical Timers: Programming based on sunrise/sunset times:

  • Operation: Uses your GPS location to calculate exact sunset/sunrise, adjusts automatically
  • Advantages: Precise scheduling, multiple on/off times, zone control
  • Examples: Turn lights on at sunset, off at 11PM automatically
  • Cost: $60-$150 for quality programmable timers

Smart Home Integration: Control through home automation systems:

  • Platforms: Apple HomeKit, Google Home, Amazon Alexa, or dedicated systems
  • Capabilities: Voice control, smartphone apps, automation rules, remote access
  • Advanced features: Motion sensor triggering, presence detection, vacation modes
  • Cost: $100-$400 for smart hub/controller plus smart switches/dimmers

Zoning for Flexibility

Creating separate control zones provides lighting flexibility:

Recommended Zones:

  • Zone 1: Main patio ambient lighting (overhead strings or area lights)
  • Zone 2: Task lighting (grilling, dining, prep areas)
  • Zone 3: Accent lighting (landscaping, architectural features)
  • Zone 4: Safety lighting (steps, transitions, paths)

Benefits of Zoning:

  • Use only needed lighting (save energy)
  • Create different moods for various activities
  • Allow guests to control their space independently
  • Progressive illumination as evening progresses

Implementation: Separate circuits or smart switches for each zone, controlled individually or as groups.

Cost-Effective Approaches: Phased Installation

Budget constraints don't require sacrificing lighting entirely—phased implementation provides immediate benefits while spreading costs:

Phase 1: Essential Safety and Function ($800-$1,500)

Start with lighting that makes your patio safe and minimally functional:

  • Safety lighting: Steps, level changes, primary pathways
  • Basic ambient lighting: Simple string lights or 2-3 area lights
  • Dining area task lighting: One overhead fixture or focused spot
  • Power infrastructure: Transformer and main cable runs for future expansion

This initial phase provides immediate usability while establishing electrical infrastructure for additions.

Phase 2: Enhanced Ambiance ($600-$1,200)

Add lighting that improves aesthetics and comfort:

  • Accent uplighting: 3-5 fixtures highlighting trees or retaining walls
  • Conversation area lighting: Focused illumination for seating zones
  • Additional ambient lights: Expanding coverage to patio edges
  • Control upgrades: Timer or basic smart control for convenience

Phase 3: Full System and Automation ($400-$1,000)

Complete the system with finishing touches:

  • Remaining accent lighting: Fill in gaps, add architectural highlighting
  • Smart controls: Upgrade to full home automation integration
  • Specialty lighting: Water features, art pieces, specialty fixtures
  • Refinement: Adjust, upgrade, or relocate fixtures based on usage patterns

Total phased cost ($1,800-$3,700) is identical to complete installation but spreads investment over 2-3 years while providing immediate benefits.

Maintenance and Seasonal Considerations

Proper maintenance ensures your lighting investment continues performing:

Minnesota Winter Precautions

Pre-Winter Tasks (October-November):

  • Clean all fixtures of leaf debris and dirt
  • Tighten any loose connections or mounting hardware
  • Verify drainage around ground-level fixtures prevents ice formation
  • Document fixture positions before snow cover

Winter Considerations:

  • Most quality outdoor fixtures handle snow accumulation without damage
  • Avoid forcibly removing ice buildup from fixtures
  • Mark fixture locations with stakes to prevent snow removal damage
  • Consider reducing lighting hours during extreme cold to extend LED lifespan

Spring Reactivation (March-April):

  • Inspect all fixtures for winter damage once snow melts
  • Clean accumulated dirt and check for moisture intrusion
  • Re-aim fixtures affected by frost heave or ground movement
  • Test all functions before regular use begins

Ongoing Maintenance

Annual Tasks:

  • Clean fixture lenses (dirt reduces light output 20-30%)
  • Trim vegetation that has grown to block light patterns
  • Check and replace any burned-out bulbs (primarily non-LED systems)
  • Verify timer/control settings remain accurate

Every 2-3 Years:

  • Inspect low-voltage cable connections for corrosion
  • Check transformer function and connections
  • Consider re-aiming fixtures as landscape matures
  • Update smart controls with firmware updates

Making Your Lighting Decisions

After exploring options, costs, and considerations, use this framework to develop your approach:

Start With Function: Identify non-negotiable lighting (safety, basic task lighting) and budget that first.

Add Ambiance: Determine primary use pattern (dining, entertaining, relaxation) and light accordingly.

Consider Future: Even if budget is tight, install electrical infrastructure during patio construction for future additions.

Prioritize Quality: Better to install fewer high-quality LED fixtures than many cheap ones requiring replacement.

Plan for Control: Budget $100-$300 for basic timing/control that provides automation convenience.

Integrate with Overall Design: Lighting should complement your patio design, hardscaping, and landscape rather than feeling added-on.

Conclusion: Light Transforms Limited Space into Lifestyle Asset

The difference between a patio you use 20 times per summer and one you enjoy 80+ evenings per year often comes down to lighting. Minneapolis's seasonal limitations make every warm evening precious—lighting ensures you maximize that limited window.

Whether you're planning a new concrete patio installation or enhancing an existing space, lighting considerations dramatically affect your outdoor living experience. The investment typically pays for itself within 2-3 years through increased home use and entertainment value, while adding property value that often exceeds installation costs.

Smart planning during initial construction saves significant future expenses while providing flexibility. For existing patios, modern low-voltage and smart lighting systems make professional-quality installations achievable at reasonable costs. The result is outdoor space that serves your family from afternoon through late evening, effectively doubling your patio's functional value.

Ready to discuss lighting options for your concrete patio project? Contact Preferred 1 Concrete for a consultation. While our primary expertise is concrete installation, we coordinate with lighting professionals and can plan electrical infrastructure during patio construction to enable future lighting additions. Our 20+ years of Twin Cities experience means we understand how to integrate all elements—concrete, drainage, structures, and utilities—into cohesive outdoor living spaces that serve your family year-round.

Concrete Patio Lighting Ideas for Minneapolis Backyards: Extending Your Outdoor Living Season

Transform your Minneapolis concrete patio with strategic lighting. Expert guidance on LED options, safety considerations, and extending Minnesota outdoor living into evening hours.

Segmental Retaining Walls vs. Poured Concrete Walls: A Minneapolis Homeowner's Cost and Durability Comparison

Compare segmental block and poured concrete retaining walls for Minneapolis properties. Cost, durability, and performance analysis for Minnesota freeze-thaw conditions.

Concrete Patio Expansion Ideas: Adding to Your Existing Minneapolis Patio Without Starting Over

Expand your existing concrete patio in Minneapolis without complete replacement. Expert guidance on matching patterns, colors, and seamless additions for Twin Cities homes.

Tiered Concrete Patios vs. Single-Level: What Works Best for Sloped Twin Cities Yards

Should you build tiered or single-level concrete patios for your sloped Twin Cities yard? Compare costs, drainage, and design options for Minnesota properties.

Concrete Patio Drainage Solutions: Preventing Water Problems in Minneapolis Yards

Learn proper drainage solutions for concrete patios in Minneapolis. Expert guidance on slopes, French drains, and preventing foundation water damage in Minnesota yards.

Stamped Concrete Patio Cost Guide: Minneapolis Pricing for Popular Patterns & Colors

How much does stamped concrete cost in Minneapolis? Get detailed 2026 pricing by pattern complexity, colors, and size plus ROI analysis for your patio project.

When is the Best Time to Pour Concrete in Minnesota? (Seasonal Guide for Homeowners)

When should you pour concrete in Minnesota? Learn optimal temperatures, seasonal advantages, and why planning ahead saves money on your concrete project.

Concrete Patio vs. Deck: Which is Better for Minnesota Homes? (Cost, Maintenance & ROI Compared)

Concrete patio or wood deck for your Minnesota home? Compare upfront costs, 20-year maintenance, durability, and resale value to make the right choice.

Concrete Driveway Cost Minneapolis: Complete 2026 Pricing Breakdown by Size and Style

How much does a concrete driveway cost in Minneapolis? Get transparent 2026 pricing by size, finish type, and site conditions from Twin Cities concrete experts.

Best Concrete Contractor Near Me: How to Choose the Right One in the Twin Cities

Looking for the best concrete contractor in Minneapolis-St. Paul? Learn the 7 critical factors that separate quality concrete contractors from the rest in Minnesota.

How Much Does a Concrete Patio Cost in Minnesota? (Twin Cities Pricing Guide)

Understand the costs associated with building a patio at your Twin Cities home.

How Tall Can You Build a Retaining Wall Without a Permit in Minnesota?

Make sure your retaining wall is compliant with local codes.

Does a Concrete Patio Increase Home Value? (Minnesota Real Estate Data Inside)

Learn about the financial benefits of adding patio to your Twin Cities yard.

Best Concrete Patio Styles for Minnesota Outdoor Living (From Homeowners Who Use Them Year-Round)

Check out some of the most popular types of patios for Twin Cities homes.

How to Protect Your Concrete Patio from Minnesota's Freeze-Thaw Cycles (And Why It Matters)

Keep your patio and retaining wall safe this winter with these tips from our experts at Preferred 1 Concrete.

Modern Concrete Patio Cost Breakdown: What Minneapolis Homeowners Should Expect in 2026

When planning to install a new concrete patio, you can expect the following expenses.

7 Modern Concrete Patio Color Trends Replacing Plain Gray in Twin Cities Backyards

When installing a new concrete patio at your Twin Cities home, consider these popular colors.

Modern Concrete Patio Ideas for Minneapolis Homes: 2025-2026 Design Trends

Check out these ideas for your concrete patio in the Twin Cities.

How Long Does a Concrete Driveway Apron Last? Maintenance Tips from Minnesota Concrete Experts

When you invest in a concrete driveway apron, learn how long it can expect it to last.

Garage Flooding? Your Driveway Apron Might Be the Problem

If your garage floods, it can be due to numerous issues, including an issue with the driveway apron.

Concrete Apron vs. Asphalt Apron: Which is Better for Minnesota Weather?

Should you install a concrete or asphalt driveway at your Twin Cities homes? Check out these tips.

Sunken Driveway Apron? Here's What's Causing It and How to Fix It Permanently

If your driveway apron is sinking, it can be due to these issues.

Concrete Driveway Apron Cost in Minneapolis: What You Should Expect to Pay in 2025

Learn what you can expect to pay for a concrete driveway apron in the Twin Cities.

Before You Pour: Essential Questions Every Twin Cities Homeowner Should Ask Their Concrete Patio Contractor

Ask concrete contractors these key questions before they start on your patio.

Small Backyard, Big Impact: Concrete Patio Design Ideas for Compact Twin Cities Yards

Think your yard is too small for a patio? Think again. Check out these ideas.

Concrete Patio Maintenance Through Minnesota's Four Seasons: A Homeowner's Year-Round Guide

Use these tips to keep your concrete patio well maintained all year.

Stamped Concrete vs. Traditional Brushed Patios: Which Twin Cities Homeowners Choose and Why

Should you get a stamped concrete patio or traditional one? Learn more about each.

DIY vs. Professional Retaining Wall Installation: Why Twin Cities Homeowners Choose Experts

It's essential to hire the experts when you need to install a retaining wall at your Twin Cities home.

How Long Do Retaining Walls Last in Minnesota? A 20-Year Maintenance Guide

Learn about the estimated lifespan of retaining walls in the Twin Cities.

Top 5 Retaining Wall Designs to Boost Your Burnsville Home's Curb Appeal

Consider these common retaining wall styles to improve your outdoor space.

Retaining Wall Cost Guide for Twin Cities Homeowners: What to Expect in 2025

How much does it cost to install a retaining wall? Check out these estimates.

Minnesota Winter-Proof Retaining Walls: Materials That Survive Harsh Weather

Keep your retaining wall in good condition all year by taking these essential steps to winterize it.

Concrete Driveway Maintenance Tips for Minnesota Homeowners

Keep your Twin Cities driveway in good shape with these maintenance tips.

The Complete Guide to Concrete Driveway Installation: What Twin Cities Homeowners Need to Know

Learn what to expect during your concrete driveway installation in the Twin Cities!

Decorative Concrete Driveway Ideas to Boost Your Twin Cities Home's Curb Appeal

Want a unique driveway? Learn how with decorative concrete driveways.

How Long Do Concrete Driveways Last in Minnesota's Climate?

Learn how long you can expect your concrete driveway to last at your Twin Cities homes.

Concrete vs. Asphalt Driveways: Why Minneapolis Homeowners Choose Concrete

Why should you install a concrete driveway? Check out the factors to consider.

Top 7 Concrete Contractors in Lakeville, MN

When you need concrete work done at your Lakeville home, check out these top concrete contractors.

8 Coolest Concrete Patio Ideas

Need inspiration for your concrete patio? Consider these cool ideas.

Most Popular Types of Retaining Walls in St. Paul, MN

Need ideas for your Twin Cities retaining wall? Check out these common types of retaining walls.

Benefits of Installing Concrete Patios in the Twin Cities

Why should you install a concrete patio at your Twin Cities home? Check out the benefits they offer!

Is Concrete or Asphalt Better For My Twin Cities Driveway?

Need a new driveway? Learn why concrete driveways are the best option for Twin Cities homes.

6 Best Driveway Apron Repair Companies in Lakeville, MN

When you need driveway apron repair services in Lakeville, MN, find out which company to call (and why Preferred 1 Concrete is the answer!).
No items found.

How a Concrete Driveway Can Boost Curb Appeal Of Minneapolis Homes

When you need to replace your driveway, check out the benefits of concrete driveway services.
No items found.

Best Driveway Repair Companies Near Burnsville, MN

When you need driveway repairs in Burnsville, check out these top companies!
No items found.

When Should You Start Planning for Spring Concrete Projects?

Do you need a new driveway, patio, retaining wall or other hardscaping project? Start planning in the winter.
No items found.

Top Concrete Contractors Near Apple Valley, MN

Check out the top concrete contractors near Apple Valley, MN.

Why Fall is a Great Time to Install a Concrete Patio in Your Twin Cities Yard

Check out these top reasons why fall is a great time to install a new concrete patio.

Top 10 Hardscaping Projects for Your Twin Cities Yard This Fall

Check out these popular types of hardscaping projects you can add to your Twin Cities yard.
No items found.

Cool Retaining Wall Ideas for Small Yards

Looking for retaining wall ideas for your small yard? Check out some of these cool ideas.

Best Driveway Repair Companies in Lakeville, MN

Check out the top concrete driveway repair contractors in Lakeville, MN.

Top Spring Hardscaping Projects to Refresh Your Outdoor Space

Improve your yard by adding hardscaping, including a patio, retaining wall, or other feature.

Signs You Need a Patio Replacement at Your Lakeville Home

Find out what symptoms can indicate you need to install a new patio.

5 Tips to Protect Your Lakeville, MN Driveway While Shoveling

Protect your driveway this winter by using these key shoveling tips from our experts at Preferred 1 Concrete.

Need a Retaining Wall? Questions to Ask Burnsville, MN Retaining Wall Experts

Find out what key questions you should ask retaining wall experts near Burnsville, MN.

Top Driveway Apron Companies in Apple Valley, MN

Check out our list of the best driveway apron companies in the South Metro.

8 Best Concrete Contractors in Prior Lake, MN

Looking for a reliable concrete contractor in the Prior Lake, MN area? Look no further! We've compiled a list of the 8 Best Concrete Contractors in Prior Lake, each with a unique set of skills and services to meet your needs.

7 Best Concrete Contractors in Bloomington, MN

This comprehensive blog showcases the top seven concrete contractors in Bloomington, Minnesota, specializing in various services such as slabs, foundations, driveways, sidewalks, patios, and more.
No items found.

8 Best Home Builders in Prior Lake, Minnesota

Explore the best eight home builders in Prior Lake, Minnesota, each with their distinctive methods of creating dream homes, ranging from luxurious estates to eco-friendly designs. With diverse expertise and years of experience, these builders offer an array of choices tailored to individual requirements, budgets, and design tastes.

6 Strategies to Protect Your Driveway for Minnesotans

Covering everything from the importance of selecting the right materials and regular sealing to the need for frequent snow removal, prompt repair of cracks, regular cleaning, and ensuring proper drainage, this blog post offers practical solutions to the common challenges faced by Minnesota homeowners.
No items found.

10 Epic Backyard Patio Ideas and Inspiration Minnesota 2022

We pulled together some amazing backyard patio ideas, deck ideas, hardscape ideas & backyard design ideas. Get some inspiration & ideas fro your backyard from Preferred 1 Concrete in Minnesota.

6 Stamped Concrete Patio Ideas 2020

6 Other Concrete Patio Ideas

5 Concrete Patio Ideas for 2019

5 Concrete patio ideas worth checking out.